

Getting Started with FT8: A Practical Guide for Icom Users
Setting up a digital mode for the first time can occasionally feel a little daunting with busy screens and a lot of technical terms. However, once you understand the basic routing between your radio and your computer, you can be on the air making contacts in no time. Here is a practical guide to getting your station configured for FT8, using the popular WSJT-X software suite.1. The Hardware Connection
If you are using a modern Icom SDR Transceiver such as the IC-705, IC-7300, IC-7610, IC-7760 or IC-9700 connecting to your PC is incredibly straightforward. You do not need any external hardware interfaces; a single USB cable connected directly between the radio and your computer handles both rig control (CAT) and audio. If you are operating an older legacy multimode transceiver, you will just need to route the connections through a standard external data interface connected to the radio’s CI-V and accessory sockets to manage the audio and PTT switching.2. Configuring Your Software Settings
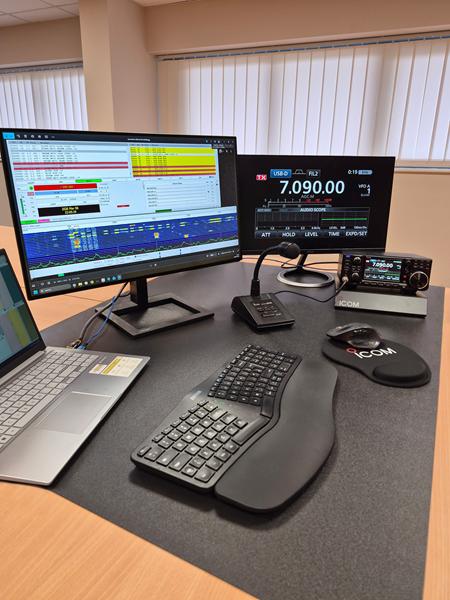
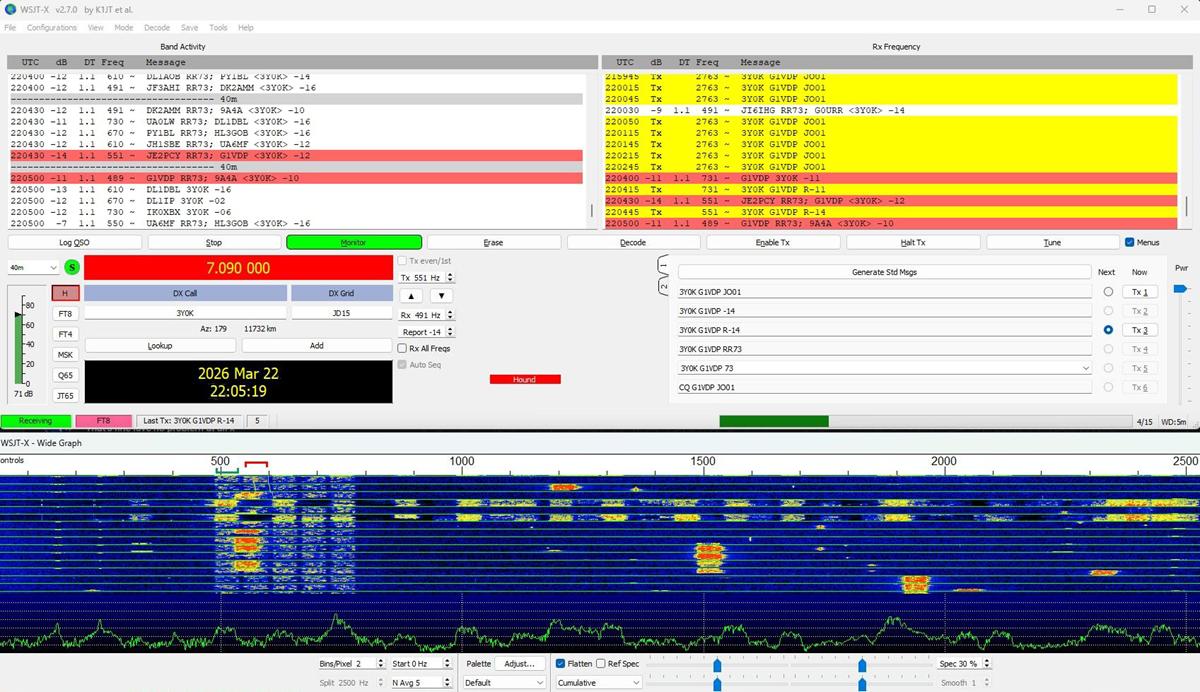
Next, you must align the audio inputs and outputs so the software can hear the radio and vice-versa. In both your PC soundcard settings and your software configuration menus, ensure the input device is set to "Microphone (USB Audio Codec)". This passes the received audio from the radio to the software for decoding. The output device should be set to "Speakers (USB Audio Codec)". This routes the transmitted audio tones generated by the software down to the radio for transmission. Once configured, use the "Test Connection" and "Test PTT" buttons in the software. When the connection indicator goes green and your radio keys up correctly, your interface is communicating perfectly. You can use the "TUNE" button to briefly transmit a steady test tone to confirm your power output is registering correctly on your radio's meter. 4. The Golden Rule: Time Synchronisation Before you attempt to make your very first contact, you must check your computer's clock. With FT8, each transmission period relies on strict 15-second intervals (alternating between odd and even cycles). Because of this, your PC clock must be highly accurate, ideally within one second of absolute real time. If your clock is out of sync by even a second or two, your software will be decoding or transmitting out of alignment, resulting in unanswered calls. To fix this, most operators use a background internet atomic clock sync utility (such as the free Meinberg Time Sync Tool) to keep their PC clock automatically disciplined every 30 minutes. 5. Making Your First QSO When you first look at the main operating screen, it can look incredibly busy, but it is highly logical.
| Received Band Activity | Rx Frequency / Your Activity |
|---|---|
| Shows all decodes happening across the band | Shows stations interacting directly with you |
Give it a Go!
While this guide covers the essentials to get you configured and making contacts, the software contains many more features and advanced modes designed for deeper exploration. The built-in help files are highly comprehensive and well worth a read as you become more familiar with the operating interface. FT8 might not be every operator's favourite mode, but it is undeniably a fantastic tool for reading band propagation and expanding your logbook. The best advice is to simply set up your software, monitor the waterfall and jump right in. Have a go, start making contacts, and above all, have fun out there on the digital frontier! Chris Colclough (G1VDP)Icom UK Amateur Radio Specialist